Thursday, April 25, 2013

Go Nude.

A staple for any lady has to be a nude or natural looking eye. It is a timeless classic look that can be worn with any outfit at anytime for any occasion. And for those of you who find the natural look to be a bit boring, I will post a few fun tricks to spruce up and add some drama to a nude eye look. Enjoy ladies and shed that smokey cover up every now and again and get those ojos naked.

Here is a step by step on how to create the perfect soft natural looking eye.


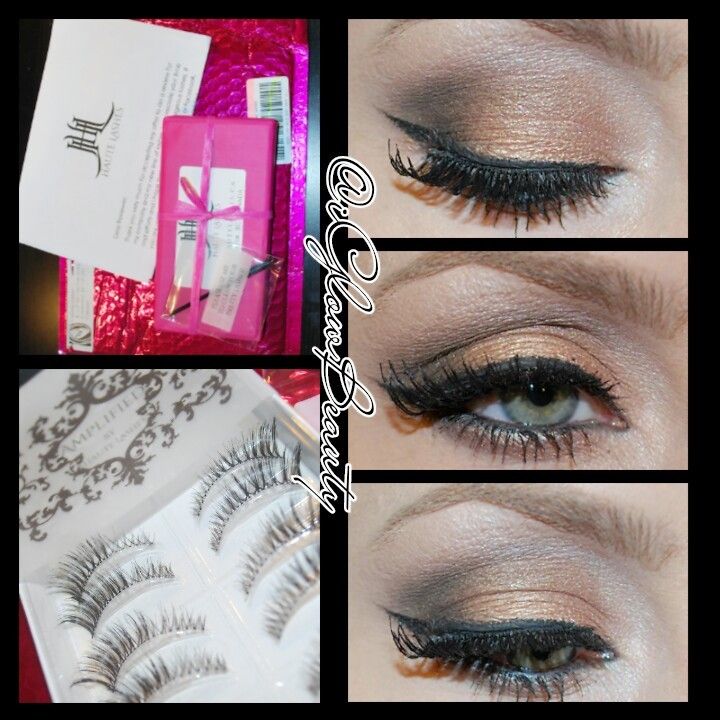
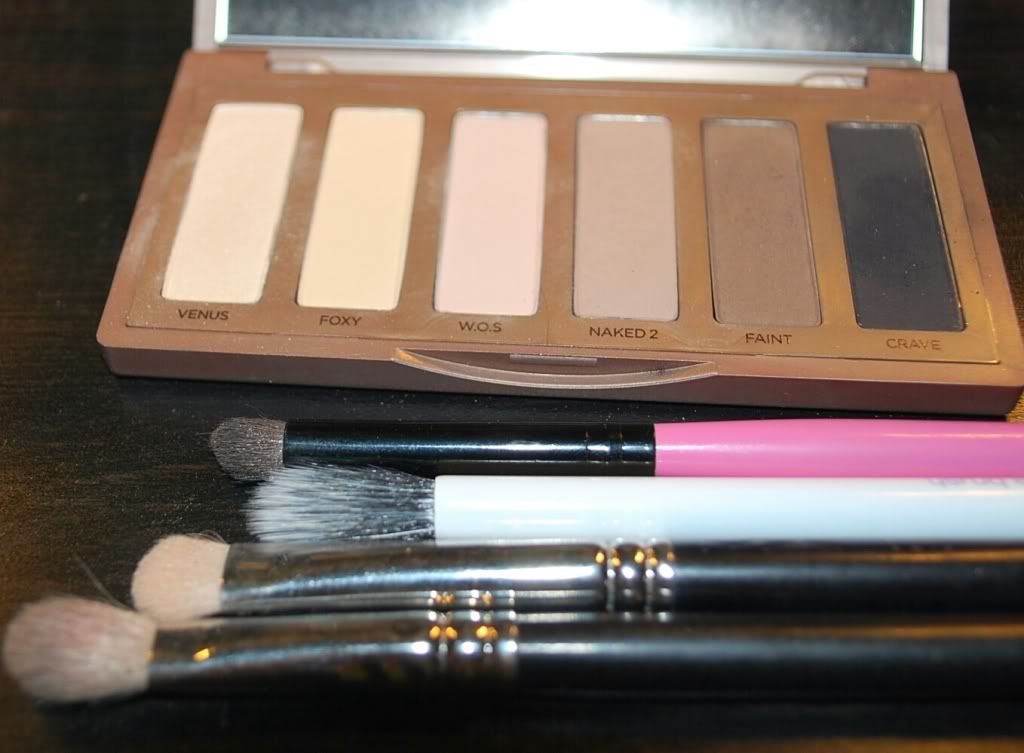
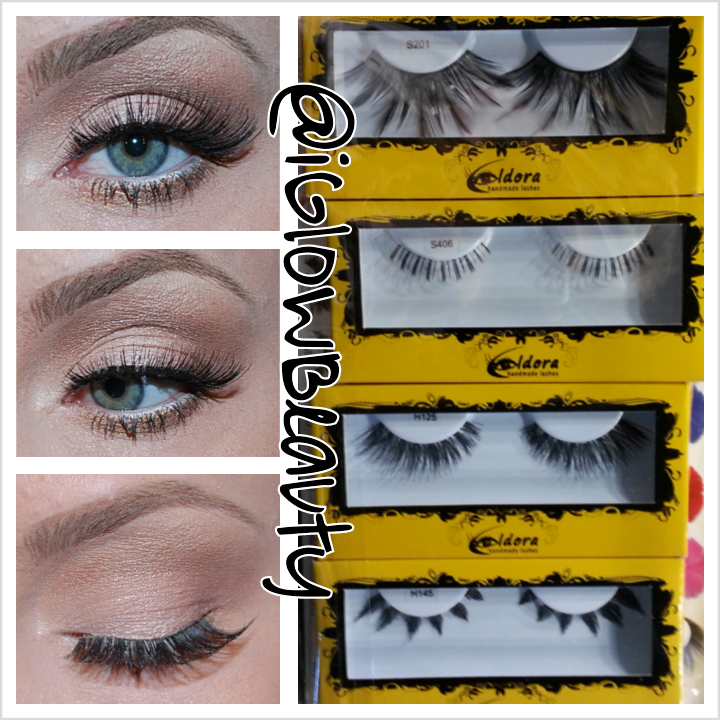
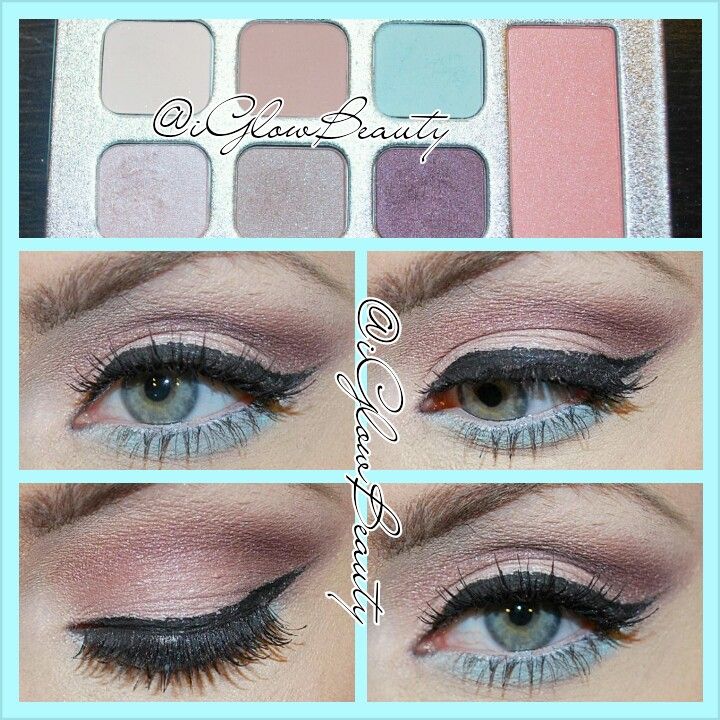
For this look I used The Urban Decay Naked Basics Palette, NYC liquid liner, Eyeko Mascara and Sonia Kashuk Full Glam Lashes.


1. You always want to start with a primed lid. I use Urban Decay Primer Potion in original. I also take NYX jumbo pencil in milk and use it on the inner corners of my eyes to make them appear brighter and bigger.

2. Taking a fluffy blending brush, I used MAC 217 brush, swipe the color Naked 2 in the palette and apply it to the crease of your eye in a windshield wiper motion. this will be your transition color.

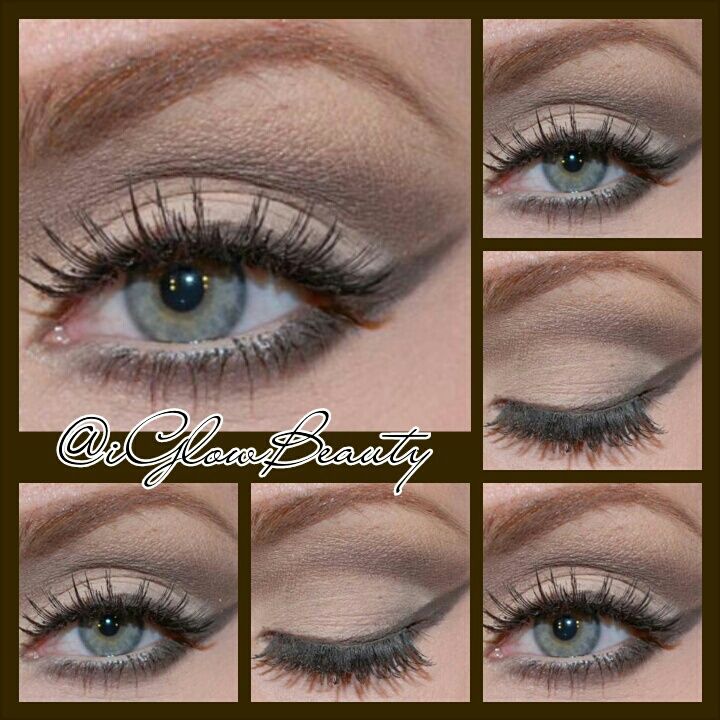
3. This is how your eye should look after step 2.

4. Take a pencil brush. I used an auraline brush and dab it lightly in the color Faint. doing the similar motion apply this color right below the lighter color you applied.

5. Taking your Blending brush again blend everything together so its not harsh looking. It should transition smoothly from the dark to light color.

6. This is what you should have so far.

7. Taking a flat shadow brush pack on the color Venus and pat it all over your lid. Smooth it over once you have the color payoff you want. 

8. Take Venus again and place it on your browbone to highlight. it gives your brows the perfect arched and raised look.

9. Taking your pencil brush again lightly dab the color Crave and apply it lightly to the outer corners of your eyes.

 10. Should look something like this.

11. With a clean blending brush, I used the Real Techniques duo fiber to blend the dark colors so there are no harsh lines. blend blend blend.

12. This is what you should have so far.

13. With whatever product is left on the pencil brush, run it along your lower lash line. To make your eyes appear larger you can line the lower water line with a white liner. If you like a more sultry look you can go with a dark liner.

14. Now liquid liner time. For me Ive found its easier to start at the wing and work my way in. I use NYC liquid liner and line the brush up against my lower lash line outer corner and flick it towards the end of my brow.

15. Now go to the inner corners and line them stopping in the middle of the lid.

16. From the end of the wing drag the brush down and attach it to where you stopped in step 15. Making a triangle.

17. Fill in the triangle.

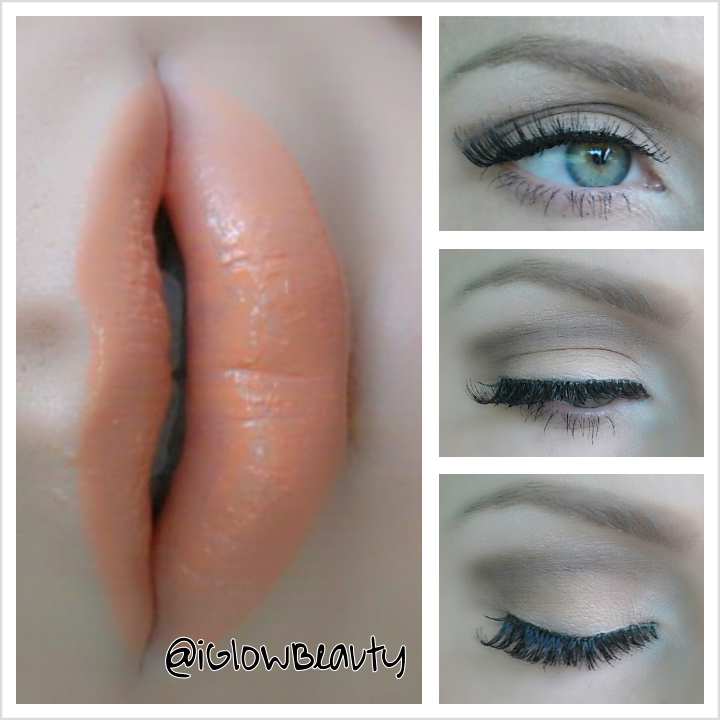
18. Apply your favorite mascara and false lashes. I used Eyeko Skinny Mini Mascara and Sonia Kashuk Full Glam Lashes.


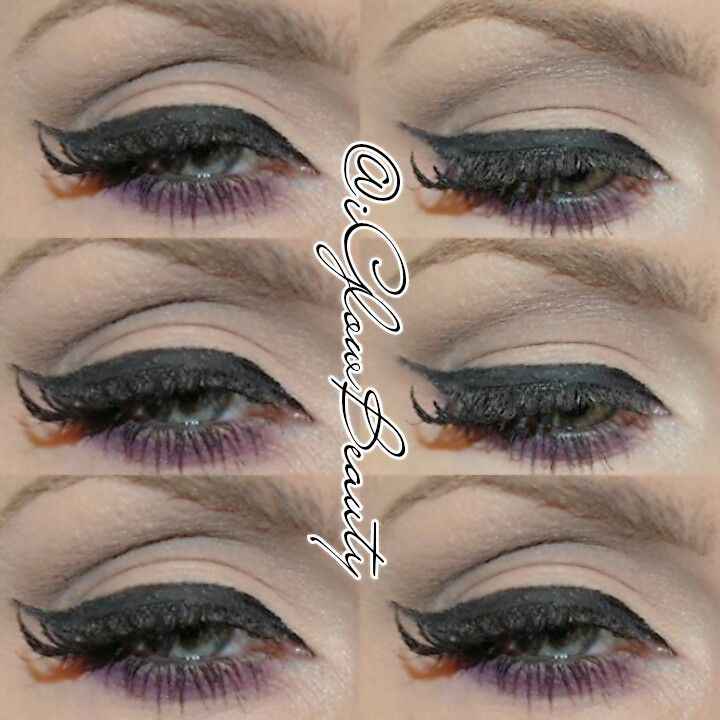
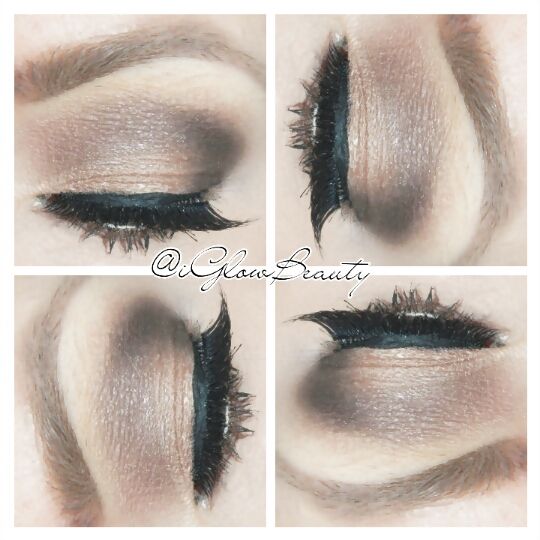
There are soooo many beautiful ways to wear this look. Literally thousands. You can tone it down with non winged liner or no liner at all. Like these looks.


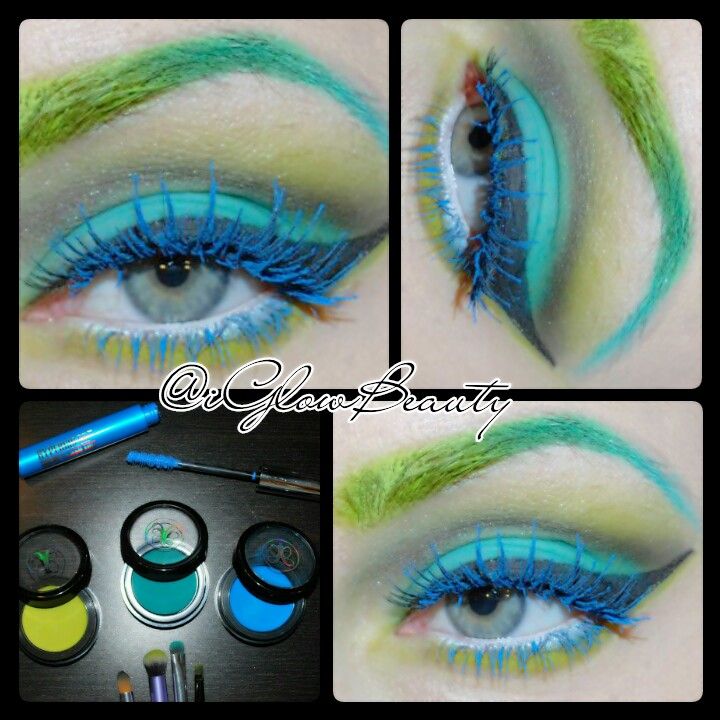
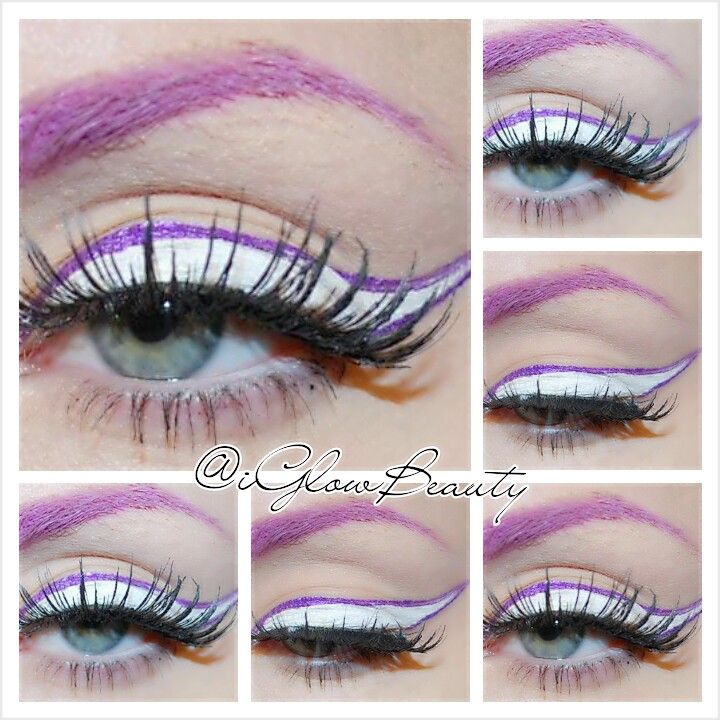
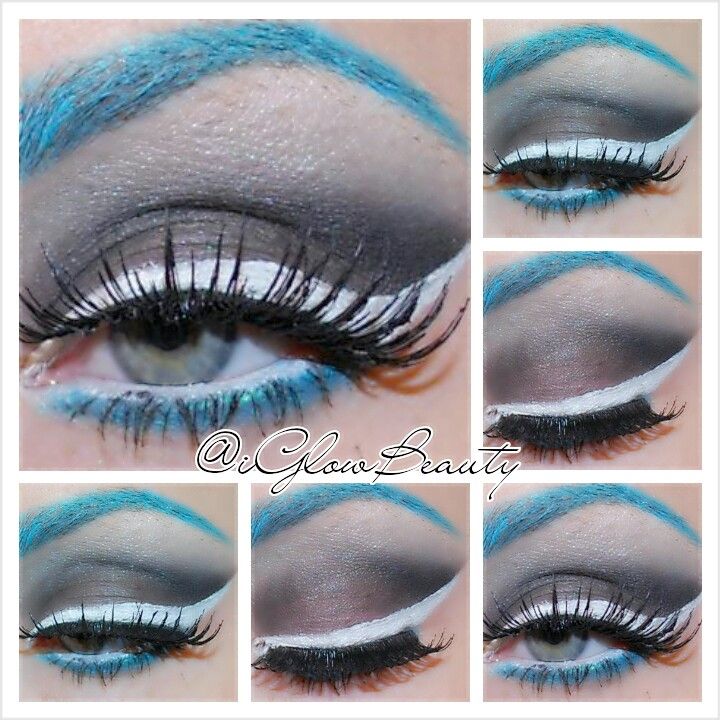
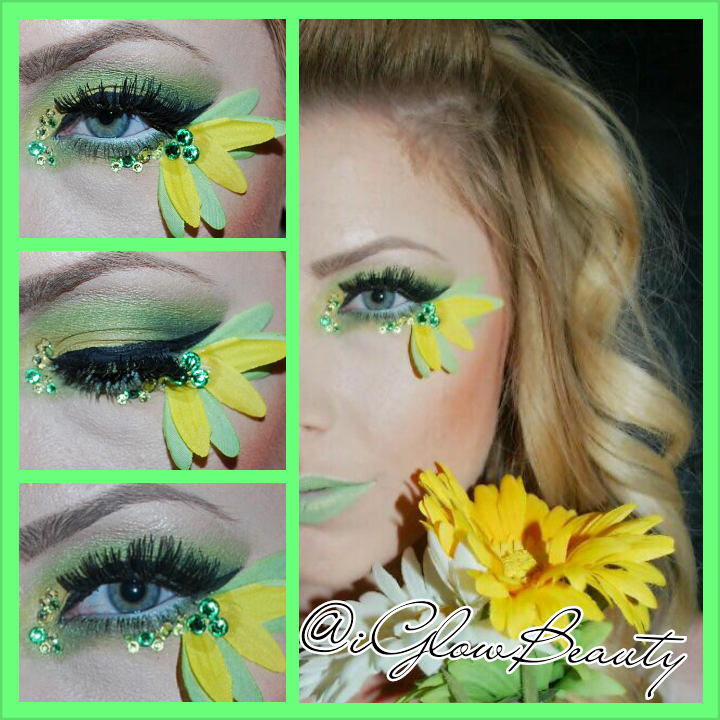
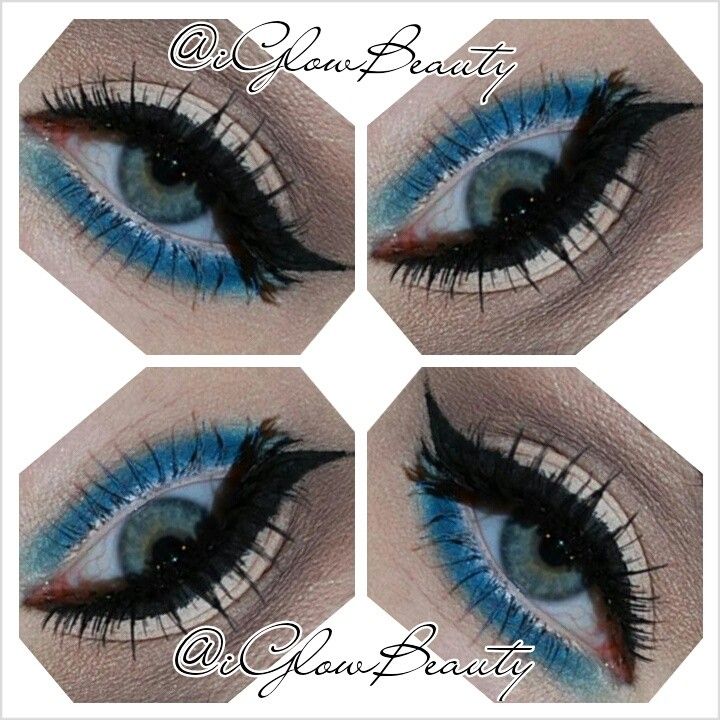
If you are into colors you can always add a pop of color to the lower lash line. For a softer look use pastels and for a bold edgy look go with bright or bold colors. Here are some examples.


And there you have it. Here are my favorite ways to wear a naked and natural looking eye. Thank you for reading. I would love to see your work.

Don't forget to subscribe my loves.

Glow on, Beauties.


Wednesday, April 17, 2013

Haute Lashes Review!!


Alright, So it's time for my first product review of many to come. Today I will tell you how I feel about Haute Lashes. 


I received these beauties in the mail a couple weeks ago. Initially, I thought the packaging was really cute. However, after about a week the top of the case started to fall apart and the label is almost completely peeled off. 


The lashes I got are from the Amplified Collection in number 19. The website has a ton of different styles to choose from. I liked these because they mix natural with dramatic. The inner corners are short and the outer corners are super long and curled. 


They fit perfectly onto my eyes so I did not have to cut them. They are relatively comfortable and did not poke or bother my eyes. I like that they are flexible. I hate stiff bands. 


The quality is definitely good for the price. You can wear them a few times before they fall apart. All in all I love these lashes. You can purchase a box of 10 lashes for just $25. Place your order now at www.hautelashes.ca


Wednesday, April 10, 2013

Brow Chicka Brow Brow. Brow Tutorial!

In my opinion Brows are one of the most important features on our faces. Here is a quick step by step on how I fill in my brows. For my brows I use all Anastasia Beverly Hills products. You can get these at any Ulta or Sephora, or her website www.anastasia.net


 The products I use everyday are Anastasia Brow Wiz in Ash Blonde, Anastasia Beauty Express Brow Kit in Blonde and Brow Tint in Blonde. 

1) Brush your brows with a clean spooly, there is one on the opposite end of your brow wiz pencil.

2) I start at the tail of my brow working my way in, you want the tail to be darkest getting lighter as you work your way in. I use light hair like strokes. Then when I get to the front of my brows I just outline them.

3) Here's what they should like.

4) Take the spooly again and run it through your brows to blend the pencil in with your brow hairs. It will remove ghe harsh outlined look.

5) Using the lighter color powder in my Beauty Express kit, I blend it in the front of my brows so there are no visible sparse spots, then take the darker color for the ends of your brows.

6) To set all of this beautiful work so it doesn't stray all day, I take the brow tint in Blonde and run in through the entire brow. it gives it that clean groomed look.

7) Last and most importantly, Take your favorite concealer that is at least a shade lighter than your foundation and a flat synthetic brush to clean up any lines or messes you made around you brows. this is what makes them look precise and it makes your lines clean and perfect.

There you have it. This is my current brow routine. If you have any questions, requests or suggestions feel free to comment below.

Til then...Glow on, Beauties!!


Saturday, April 6, 2013

Spring Trends 2013

Bright, Bold, Beautiful Colors

Seems to me that this season is all about the bright colors, bold liners and beautiful dewy skin. In this post are some fun makeup ideas that are perfect for this spring.


Coming this May, Anastasia Beverly Hills is releasing these super fun and super pigmented Hyper Color Brow and Lash Tints. I am so in love with them. The kit comes with 3 colors and a water proof clear coat to water proof any mascara. You can do anything from a subtle look of the lower lashes to something bold and daring. I will show you a few examples.


For this look, I kept it very subtle and understated. Using my Too Faced Natural Eye Palette on the lid, Heaven and Velvet Revolver. Then I applied a bold winged liner. I highly recommend NYC liquid liner. its amazing and very inexpensive. Ardel Demi Wispies lashes then you are done with the top. Taking Anastasia Hypercolor in "In The Pink" on the inner lower lash line and "Ultra Violet" on the outer lower lash line and finish with the matching mascaras.


If you are into a bolder look, I used all Anastasia products for this look. I used all three hyper colors pictured in my brows starting from lightest to darkest for the popular ombre effect. With a blending brush I applied Mega Watt Green as a transition color between my crease and brow bone and on my lower lash line. Then with a shadow brush I packed on Teal Tornado to my lid. I used a regular matte black shadow and pencil brush in my crease. Finished the look with my favorite liner, lashes and then loaded on the hypercolor lash tint in Electric Blue.


One more thing I am obsessing over right now is White eyeliner. It goes perfectly with all of these bright vivid colors, and looks so neat and unique. There are a few white liners out there, I have used Palladio Liquid Liner in "RockStar" and Inglots gel liner in number 73. I definitely prefer Ingolts gel liner because it is much easier and neater to apply. It has a matte finish and feels so soft and creamy. I highly recommend it.

Well this concludes today's post of my favorite Spring Trends. Have fun and experiment with colors! After all, its only makeup!! Here's one more look I did, inspired by spring flowers. Just for fun...


Glow on, Beauties!

xox


Thursday, April 4, 2013

Allow me to introduce myself...

So it's official. I am now a "beauty blogger". This blog will be anything from reviews, to how to's, to tutorials and pictorials. Now, let me begin by telling you a bit about myself.

My name is Tawni and I live in Orange County CA. First and foremost I am a mommy to a wonderful little toddler. I own my own sunless tanning company. iGlow Sunless Bronzing located in Costa Mesa CA. www.iglowsunlessbronzing.com
I also am a self taught freelance makeup artist who LOVES airbrush makeup!!

I guess to start with, that's all I have to say. I will be posting some pictorials soon and how to's. So be on the lookout for those. I also do fun giveaways and contests. If you love makeup then subscribe and tell your girlfriends too! Thank you for all of the love and support!

Glow on, beauties!!
Tawni